 Hack the Hydra
How to compress an image
Open the Compress Image tool, drop in a JPG or WebP file, set the quality to about 75 and the maximum width to 1920 px, and download the result. For most photos this cuts the size by a large factor with no visible difference on a screen.
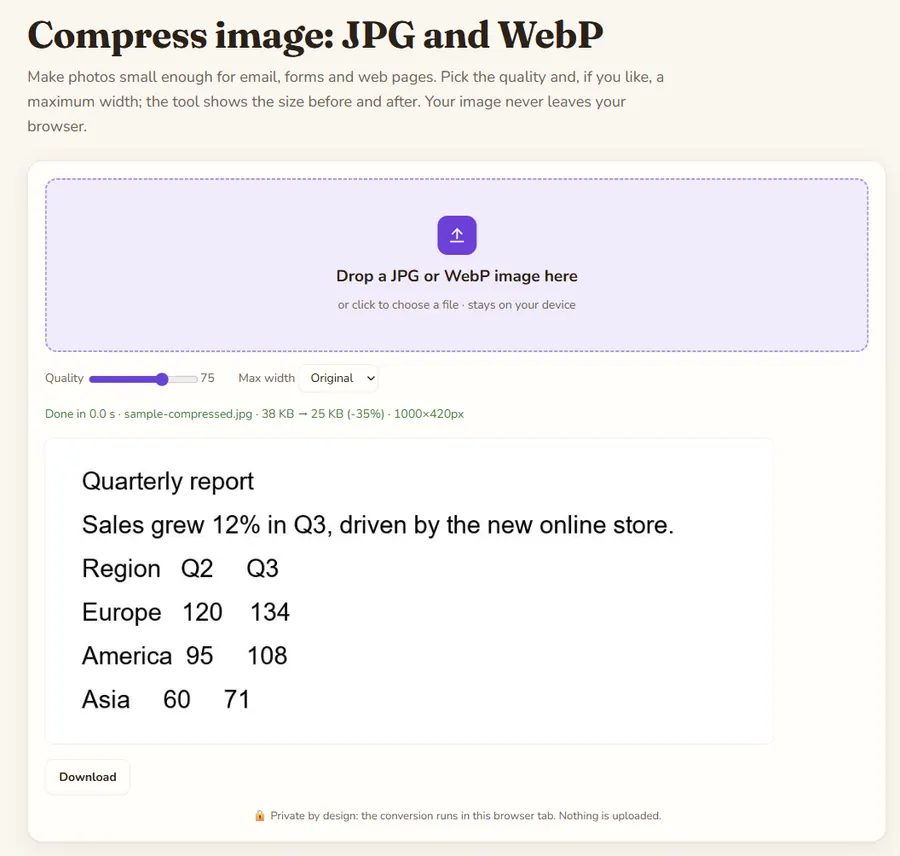
The two levers
An image is large for two reasons: it has many pixels, and each pixel is stored with little compression. The tool lets you change both. Quality sets how aggressively the pixels are compressed. Maximum width sets how many pixels there are. Reducing the width is usually the more powerful move: a 12-megapixel phone photo is about 4000 px wide, far more than any screen or email needs.
Steps
- Open Compress Image.
- Drop your JPG or WebP file, or click to choose it. You can add several.
- Set the quality slider. Start at 75.
- Choose a maximum width, or keep Original if you must not resize.
- Compare the size before and after, then click Download.
Settings that work
- Web page or email: quality 75, width 1920 px.
- You may still print it: quality 85, original width.
- Upload limits such as 200 KB on a form: quality 60, width 1280 px, then go lower in small steps until you are under the limit.
- Thumbnails and avatars: width 800 px or less.
Change one setting at a time so you can see which one made the difference.
Which formats are supported?
The tool compresses JPG and WebP, and saves them in the same format. If you have a PNG screenshot or a photo saved as PNG, convert it first with PNG to JPG; photographs are much smaller as JPG. Keep PNG for logos and flat graphics where sharp edges matter.
Why is the result sometimes bigger?
An image that was already well compressed can grow when re-encoded. The tool shows the before and after sizes, so you will see it. In that case lower the quality or width, or just keep the original.
How do you compress many photos?
You can add several images at once and apply the same settings to all of them, which is handy for a gallery or a product catalog. Use one setting for the whole batch, then open the largest and the most detailed image at 100 % to confirm the quality holds. Name the outputs clearly and keep your originals in a separate folder: compression is lossy, and you cannot get the discarded detail back from the small copy.
For websites, also set explicit width and height attributes in your page so the layout does not jump while images load.
Check the result
Zoom to 100 % and look at faces, text and gradients, where artifacts show first. Blocky patches or banding mean the quality is too low. Metadata is not carried over: the image is redrawn and re-encoded in your browser, so EXIF data such as GPS location, camera model and capture date is not copied into the compressed file (we checked this with a test photo).
Privacy: the file is processed in your browser tab and is not uploaded to a server. Once the page has loaded you can even disconnect from the internet and it keeps working.
FAQ
How do I get a photo under 200 KB?
Start with quality 60 and a width of 1280 px. If it is still too big, reduce the width to 800 px or lower the quality in steps of 5.
Does compression lose quality?
JPG and WebP compression is lossy, so some detail is discarded. At quality 70 to 85 the loss is rarely visible on screen.
Can it compress PNG?
Not directly. Convert PNG photos to JPG first, then compress.
Is my image uploaded?
No. It is processed in your browser and never sent to a server.
Last updated: November 2026. Facts about third-party tools come from their public repositories and documentation. Check licenses before commercial use.